目标检测的事儿,咱们不绕弯子了。这篇文章就是教你一件事:
3分钟教你用YOLOv11检测口罩、手套、防护服,工业、医疗、安防一网打尽。
这篇文章不会深究模型原理,而是手把手带你跑通全流程训练与推理,使用的数据是HuggingFace上经典的CPPE-5数据集,涵盖多种个人防护装备(PPE)目标检测任务。
✳️什么是 CPPE-5?
这里采用rishitdagli/cppe-5公开数据集,含以下5类标签:
| 类别英文 | 中文含义 |
|---|---|
| Coverall | 防护服 / 连体衣 |
| Face_Shield | 面罩 / 防护面屏 |
| Gloves | 手套 |
| Goggles | 护目镜 |
| Mask | 口罩 |
共1000张图片,真实复杂场景,适合目标检测实战测试。
🚀 快速开始(带你跑通)
1. 下载数据集
1 | wget https://huggingface.co/datasets/rishitdagli/cppe-5/resolve/main/data/test-00000-of-00001.parquet |
2. 转换成yolo格式
2.1 数据预处理脚本
1 |
|
2.2 配置文件data.yaml
1 | train: /object_detection/yolo_impl/images/train |
3. 启动YOLOv11模型训练
1 |
|
📊 训练效果如下(示例):

4. 推理预测
1 |
|
🔍 示例结果:
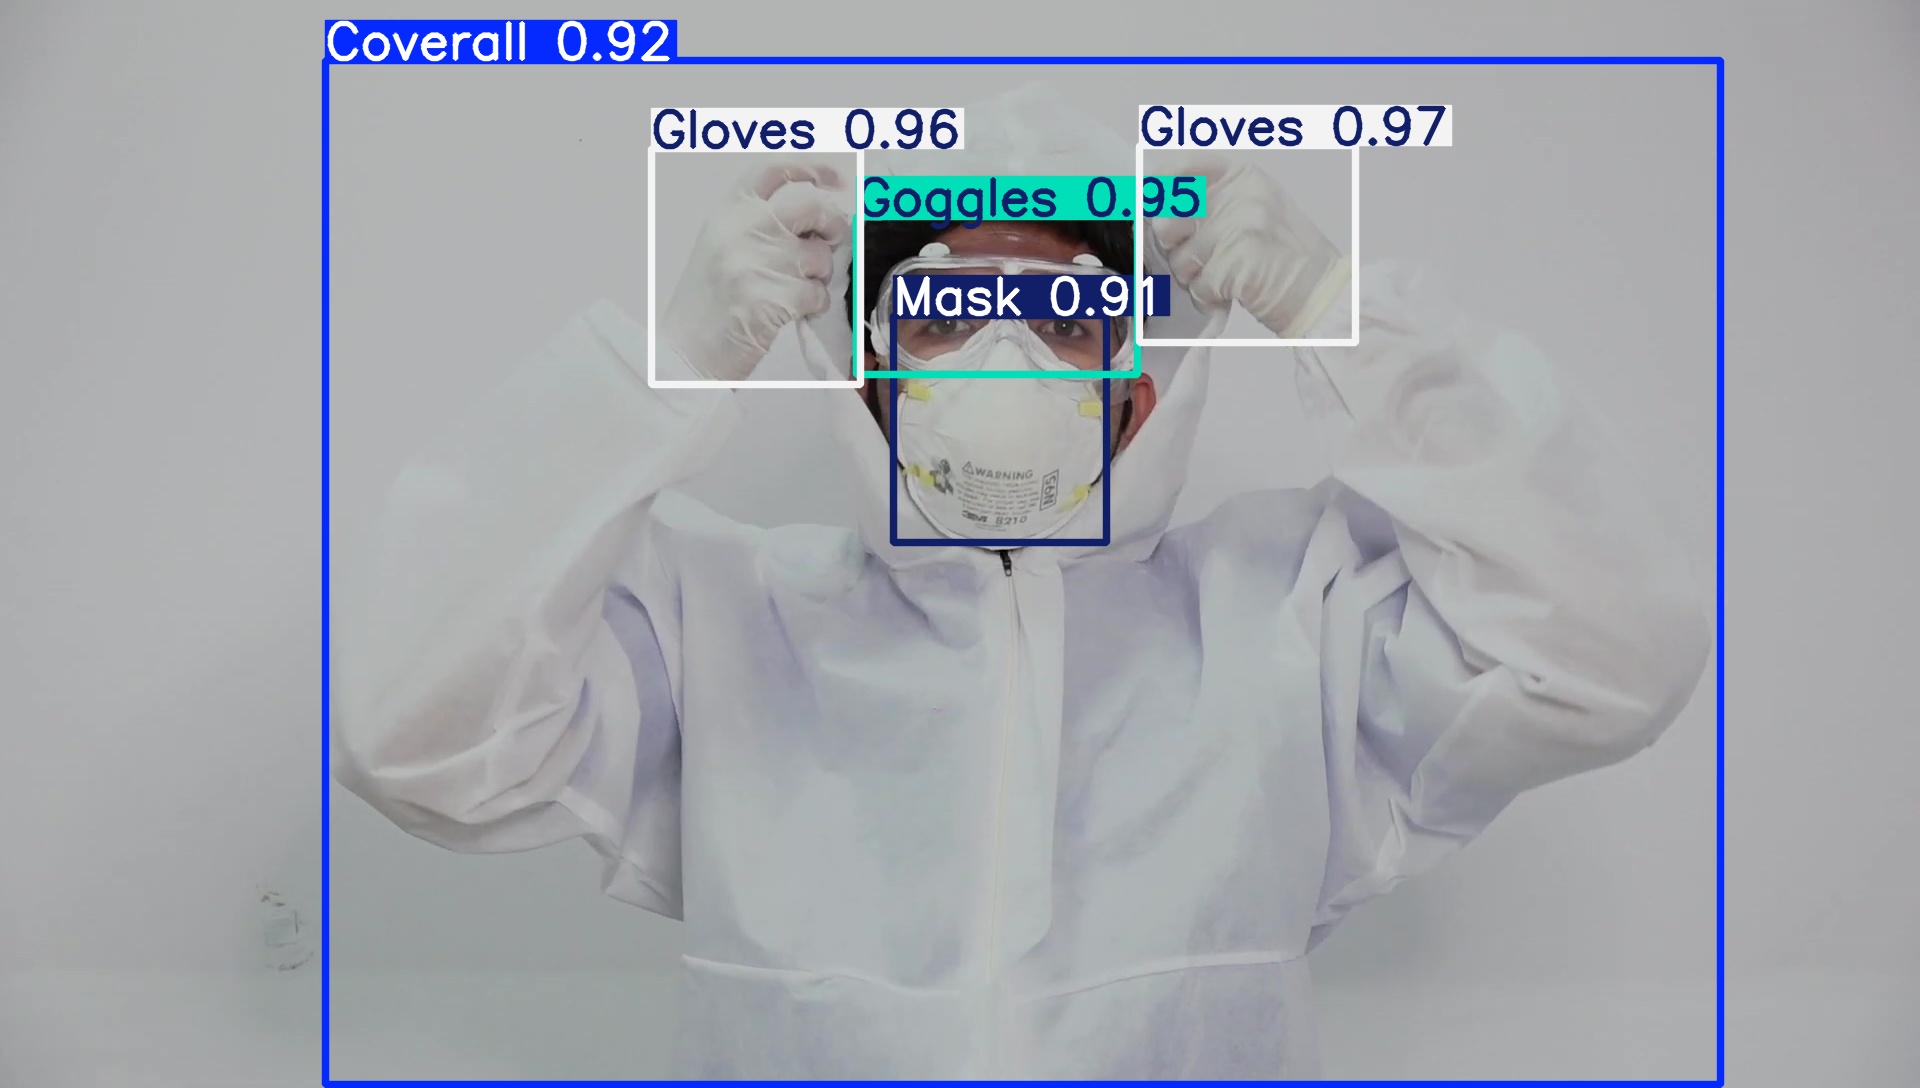 |
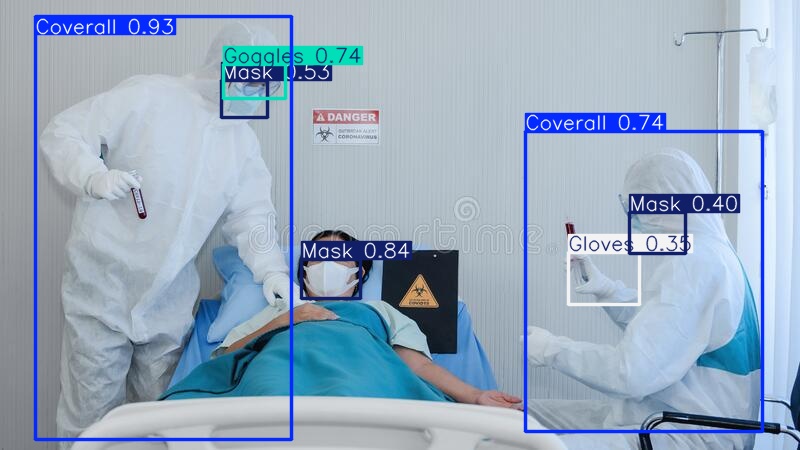 |
|---|---|
| 预测结果1 | 预测结果2 |
✅ 总结
恭喜你,现在你已经掌握了如何用YOLOv11快速完成PPE检测模型训练与推理,下一步可以尝试:
- 加入你的实际工业/医疗图像
- 微调超参数
- 部署模型到边缘设备
📬 有问题欢迎评论交流,觉得有用记得一键三连 🙌!